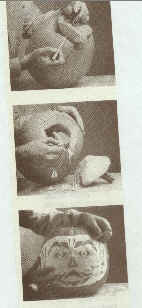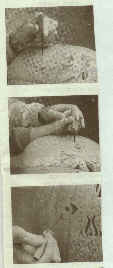


It is important to scrape the inner wall of the pumpkin on the side where you anticipate doing your carving. The carving wall should be no more than 1 inch thick.
Select the pattern you want to use and attach the pattern (scotch tape it or pin it with tiny tacks) to the face of the pumpkin. If you are in need of some patterns, you can click here and go to jack-o-lantern.com - click on "patterns" and scroll down. You can enlarge any pattern you like and print if off. Also look for related links if you need more.
Using the poker tool (the tip of a bic pen can do however better yet, your local retailer also sells "Pumpkin Master's Carving Kits") press the pointed tip into and through the design lines of the pattern spaced about an 1/8" apart.
In other words, along the outside edges of shaded area's of your design, you want to poke holes into the skin of the pumpkin. Complex designs might require dots closer together. Remember the holes should be pushed in just enough to go through the paper and the skin of the pumpkin, not all the way into the pumpkin. Before removing the pattern, look it over very carefully to make sure that all the lines have been transferred.
Remove the pattern and you end up with a pumpkin with lots of tiny holes. For better viewing, rub flour over the face of your pumpkin so it is easier to see what you are doing.

Now
you can start carving or actually sawing. Carefully cut the design
out
using a tiny saw as indicated. (That comes with the carving kit or
you may find something
else that does the job.) It's important to remember that these are
"saws", not knives.
If you bend or twist the tool to much it will break the blade.
Starting from the center of the design and working outward, push the tip of the saw-blade into a hole and saw down the design lines with a short back-and-forth motion while applying light pressure in the direction of the line you are working on. Basically you're playing "connect the dots". Saw steadily with a continuous up-and-down motion. Carefully push cut pieces out with your finger or an un-sharpened pencil.
Remember
if your pumpkin(s) begin to shrivel, no matter how bad they look, simply
immerse them in water
for a few hours and they will unravel and return to their exact
carved form - like magic.
You'll then get a few more days before they start to go again.
It also helps to rub
Valseline around the inside cut edges - this will further extend your
pumpkin
life by keeping the moisture in.
When
you are finished, put an xmas light inside and turn of your room lights.
You'll be able
to trim off any excess, etc. that is showing.
